-
[Form 라이브러리] React Hook FormFront-End(Web)/React - 라이브러리들 2023. 3. 19. 00:37반응형
🧐 개요
이전 포스팅에선, Form 라이브러리를 도입한 배경과 React에서 많이 활용되는 Formik 라이브러리에 대해 포스팅했다. (링크)
[Form 라이브러리] formik
🧐 개요 프로젝트들을 진행하면서, 입력 form 컴포넌트를 제작해야 하는 경우가 종종 존재하였다. 특히, 폼 제어를 위한 다양한 기능들이 요구된다. (입력값 관리, 유효성 검사 및 에러상태 관리,
abangpa1ace.tistory.com
포스팅 초반부에서 소개했듯, Formik과 더불어 통용되는 라이브러리가 React Hook Form(이하 RHF) 이다.
개인적으론 이 라이브러리에 장점을 더 느꼈으며, 포스팅을 통해 주요개념과 왜 그렇게 생각했는지를 함께 소개해보겠다!
* 폼 라이브러리 비교
구분 formik React Hook Form 기본원리 Controlled Component (state, Context 기반) Uncontrolled Component (ref 기반) 렌더링 성능 낮음 성능 높음 Bundle Size 44.34KB 12.12KB Dependency 7개 0개 (dependency-free) Typescript O O 부분 Watch X O 템플릿 코드 상대적으로 많음 상대적으로 적음 주요 장점 UI 프레임워크와 호환이 좋음 Hooks API 기반으로 되어있으 함수 컴포넌트에 적합
공식문서 설명이 잘 되 있음, 커뮤니티와 업데이트가 활발주요 단점 업데이트가 활발하지 못함 (최근 업데이트가 1년 전) 클래스 컴포넌트에서 사용불가(Hooks) 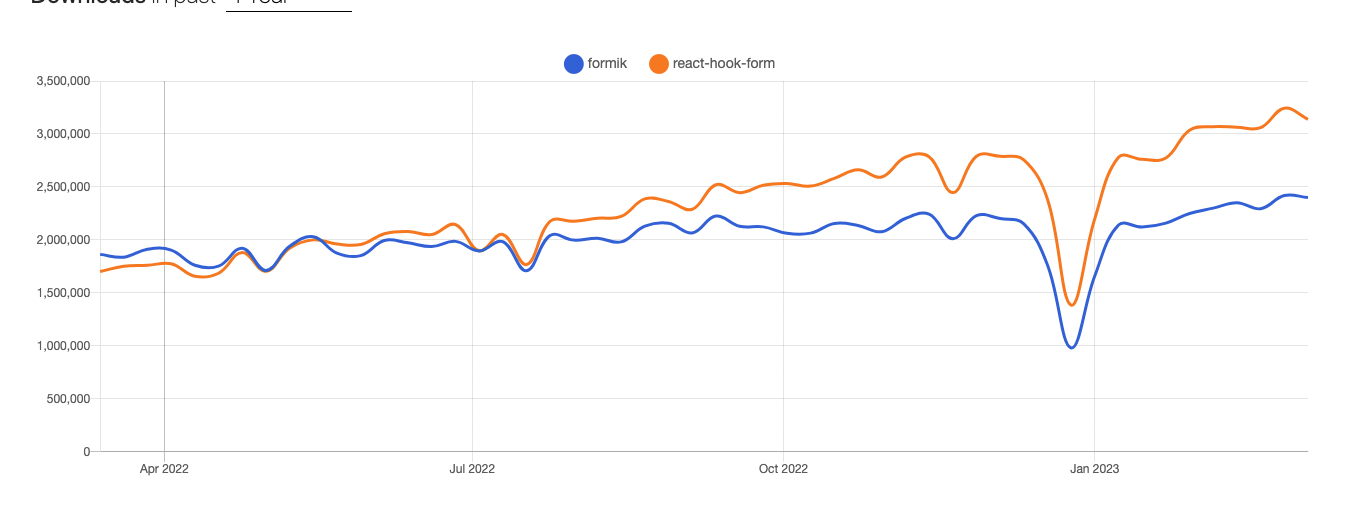
💙 React Hook Form
RHF는 위에서 기술했듯이, Uncontrolled Component(ref) 기반으로 제공되는 폼 라이브러리이다.
그렇기에 렌더링같은 면에서 상대적으로 성능이 좋다. (단, 커스텀 컴포넌트에는 fowardRef 로 전달해줘야 함)
또 하나 대표적인 특징은, 바로 Hooks API 기반으로 구성되어 있다는 것이다. (useRef)
그렇기에, 현재 함수 컴포넌트가 적극적으로 활용되는 환경에선 친숙하지만, 클래스 컴포넌트에는 적용이 불가능하단 제약이 있다.
- 설치
npm install react-hook-form
yarn add react-hook-form
💙 useForm()
import { useForm } from "react-hook-form"; export default function App() { const { register, handleSubmit, watch, formState: { errors } } = useForm(); const onSubmit = data => console.log(data); console.log(watch("example")); // watch input value by passing the name of it return ( /* "handleSubmit" will validate your inputs before invoking "onSubmit" */ <form onSubmit={handleSubmit(onSubmit)}> {/* register your input into the hook by invoking the "register" function */} <input defaultValue="test" {...register("example")} /> {/* include validation with required or other standard HTML validation rules */} <input {...register("exampleRequired", { required: true })} /> {/* errors will return when field validation fails */} {errors.exampleRequired && <span>This field is required</span>} <input type="submit" /> </form> ); }useForm()은 RHF를 사용하는 기본문법이다. 인자는 초기값 객체(defaultValues), mode(유효성 검증 모드) 등을 받는다.
위 템플릿 코드를 참고하고, useForm이 반환하는 주요 API들의 문법과 기능을 정리해보았다.
1. register()
이 함수는, RHF에서 input 혹은 select 등 엘리먼트를 폼에 등록하기 위해 사용되는 함수이다. useForm의 반환값이다.
인자는 첫 번째로 name(엘리먼트 이름이자 고유키), 두 번째로 RegisterOptions 2가지를 받는다.
RegisterOptions은 최초 value, 기본적인 validation(required, 길이, 정규식 등), validate 함수, disabled 여부 등을 받는다.
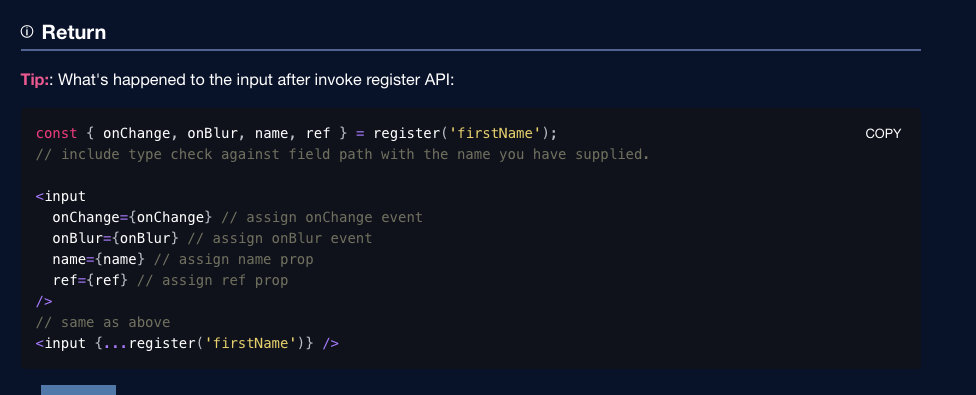
register 함수는 name, ref, onChange, onBlur 4가지 값을 객체로 반환하기에, 이를 전개 연산자로 컴포넌트 Props로 전달해준다.
2. formState
전반적이 폼의 상태를 가지고 있는 객체이다.(Formik의 Render Props와 대응) 이 객체로, 폼과의 주요 인터렉션을 구현할 수 있다.
import React from "react"; import { useForm } from "react-hook-form"; export default function App() { const { register, handleSubmit, // Read the formState before render to subscribe the form state through the Proxy formState: { errors, isDirty, isSubmitting, touchedFields, submitCount }, } = useForm(); const onSubmit = (data) => console.log(data); return ( <form onSubmit={handleSubmit(onSubmit)}> <input {...register("test")} /> <input type="submit" /> </form> ); }- isDirty : 폼과 인터렉션이 발생했는지 여부. Input 동작을 실행한 뒤엔 true가 된다.
- dirtyFields : 초기값에서 변경이 발생한 필드들의 name을 key로, true를 value로 한 객체
* 가장 많이 논의되는 것이, isDirty와 dirtyFields의 싱크가 맞지 않는다는 것이다. 왜냐면, 둘의 판단 기준이 사뭇 다르기 때문이다.
isDirty는 dirtyFields들의 존재여부가 아닌 인터렉션이 발생했는지를 감시하는 반면, dirtyFields는 초기값에서 변한 필드인지 여부를 반환하기에 defaultValues(초기값) 이 요구되는 것이다. (참고글: 화해 블로그)
- touchedFields : 인터렉션이 발생한 필드들의 name을 key로, true를 value로 한 객체
- defaultValues : useForm 에서 세팅한 초기값 객체
- isSubmitted : onSubmit 이벤트 발생 여부
- isSubmitSuccessful : 런타임 에러 없이 onSubmit을 수행했는지 여부
- isSubmitting : onSubmit 이벤트가 수행중인지 여부
- isLoading : 초기값을 불러오는게 끝났는지 여부 (defaultValues 값을 비동기 API로 받아서 넣어주는 경우)
- submitCount : onSubmit 발생 횟수
- isValid : 폼에 validation으로 걸리는 에러가 없으면 true가 된다. (setError로 에러정보를 바꿔도 isValid는 영향 없음)
- isValidating : validation을 수행하고 있는지 여부
- errors : 각 name을 key로, 여기에 해당하는 에러 메세지를 value로 하는 객체. 에러 메세지 표현에 사용되는 값
3. handleSubmit()
form의 onSubmit 이벤트로 등록하는 메서드이다. onSubmit, onError 2가지 핸들러 함수를 각각 인자로 받는다.
import { useForm } from "react-hook-form";

export default function App() {
  const { register, handleSubmit } = useForm();
  const onSubmit = (data, e) => console.log(data, e);
  const onError = (errors, e) => console.log(errors, e);

  return (
    <form onSubmit={handleSubmit(onSubmit, onError)}>
      <input {...register("firstName")} />
      <input {...register("lastName")} />
      <button type="submit">Submit</button>
    </form>
  );
}
4. watch()
폼 내의 특정 필드의 값에 따라 화면분기를 하는 경우가 있다.
RHF는 기본이 Uncontrolled라 값을 실시간으로 확인할 수 없지만, 위처럼 값에 따라 분기를 하려는 경우 watch 메서드를 활용하면 된다.
import React from "react";
import { useForm } from "react-hook-form";

function App() {
  const { register, watch, formState: { errors }, handleSubmit } = useForm();

  // watch 활용부분
  const watchShowAge = watch("showAge", false); // you can supply default value as second argument
  const watchAllFields = watch(); // when pass nothing as argument, you are watching everything
  const watchFields = watch(["showAge", "number"]); // you can also target specific fields by their names

  const onSubmit = data => console.log(data);

  return (
    <>
      <form onSubmit={handleSubmit(onSubmit)}>
        <input type="checkbox" {...register("showAge")} />

        {/* based on yes selection to display Age Input*/}
        {watchShowAge && <input type="number" {...register("age", { min: 50 })} />}

        <input type="submit" />
      </form>
    </>
  );
}
위처럼, watch에 등록한 name 혹은 name 배열들을 통해 특정 값을 computed 할 수 있다. 이 값으로 조건부 렌더링을 적용한다.
5. getValues()
RHF에서 값을 감시하는 방법은, watch 외에도 getValues 메서드가 있다. 이를 실행하면, 값 객체를 인스턴스로 받을 수 있다.
단, getValues는 특정 시점에서 값을 받을 수 있지만, 이 값을 추적하지 않기 때문에 리렌더링 등에 사용할 순 없다.
import { useForm } from "react-hook-form";

export default function App() {
  const { register, getValues } = useForm();

  return (
    <form>
      <input {...register("test")} />
      <input {...register("test1")} />

      <button
        type="button"
        onClick={() => {
          const values = getValues(); // { test: "test-input", test1: "test1-input" }
          const singleValue = getValues("test"); // "test-input"
          const multipleValues = getValues(["test", "test1"]);
          // ["test-input", "test1-input"]
        }}
      >
        Get Values
      </button>
    </form>
  );
}
6. reset()
수정모드 등에서 폼을 불러온 값으로 초기화하기 위한 메서드이다. 값을 적용하면서 keepErrors, keepDirty 등 옵션을 줄 수 있다.
import React, { useCallback } from "react";
import { useForm } from "react-hook-form";

export default function App() {
  const { register, handleSubmit, reset } = useForm();
  const resetAsyncForm = useCallback(async () => {
    const result = await fetch('./api/formValues.json'); // result: { firstName: 'test', lastName: 'test2' }
    reset(result); // asynchronously reset your form values
  }, [reset]);

  useEffect(() => {
    resetAsyncForm()
  }, [resetAsyncForm])

  return (
    <form onSubmit={handleSubmit((data) => {})}>
      <input {...register("firstName")} />
      <input {...register("lastName")} />

      <input type="button" onClick={() => {
        reset({
          firstName: "bill"
        }, {
          keepErrors: true,
          keepDirty: true,
        });
      }} />

      <button
        onClick={() => {
          reset(formValues => ({
            ...formValues,
            lastName: 'test',
          }))
        }}
      >
        Reset partial
      </button>
    </form>
  );
}
이외에도, setFocus, setValue 등의 새터함수나, getFieldState, resetField, clearErrors 등 다양한 기능들을 제공한다.
💙 React Hook Form 의 다른 기능들
- <Controller>
RHF는 기본적으로 Uncontrolled 이기에, 커스텀 컴포넌트를 적용할 때에도 ref(forwardRef) 가 반드시 필요하다.
하지만, ANTD, MUI 와 같은 UI 라이브러리에 이미 제작된 Controlled Component와 사용해야하는 경우가 있다.
이를 위한 기능이 바로 RHF에서 제공하는 <Controller> 컴포넌트인 것이다.
import React from "react";
import ReactDatePicker from "react-datepicker";
import { TextField } from "@material-ui/core";
import { useForm, Controller } from "react-hook-form";

function App() {
  const { handleSubmit, control } = useForm();

  return (
    <form onSubmit={handleSubmit(data => console.log(data))}>
      <Controller
        control={control}
        name="ReactDatepicker"
        render={({ field: { onChange, onBlur, value, ref } }) => (
          <ReactDatePicker
            onChange={onChange}
            onBlur={onBlur}
            selected={value}
          />
        )}
      />

      <input type="submit" />
    </form>
  );
}
우선, <Controller> 컴포넌트를 폼 안에 추가한다. 이는, name Props를 반드시 요구한다.
그리고, useForm() 훅에서 반환하는 control 객체를 Props로 넘겨주어야 폼과 연동을 할 수 있다.
마지막으로, render에 적용할 컴포넌트(제어형 컴포넌트 or UI 라이브러리)를 넣어준다.
위 예제 코드처럼, render에 사용되는 컴포넌트는 field, fieldState, formState(useForm의) 값들을 Props로 받는다.
* useController() Hooks
자식 컴포넌트에서 사용할 수 있는 useController 훅도 있다. 코드가 좀 더 깔끔해진다.
import { TextField } from "@material-ui/core";
import { useController, useForm } from "react-hook-form";

function Input({ control, name }) {
  const {
    field,
    fieldState: { invalid, isTouched, isDirty },
    formState: { touchedFields, dirtyFields }
  } = useController({
    name,
    control,
    rules: { required: true },
  });

  return (
    <TextField
      onChange={field.onChange} // send value to hook form
      onBlur={field.onBlur} // notify when input is touched/blur
      value={field.value} // input value
      name={field.name} // send down the input name
      inputRef={field.ref} // send input ref, so we can focus on input when error appear
    />
  );
}
- useFieldArray()
function FieldArray() {
  const { control, register } = useForm();
  const { fields, append, prepend, remove, swap, move, insert } = useFieldArray({
    control, // control props comes from useForm (optional: if you are using FormContext)
    name: "test", // unique name for your Field Array
  });

  return (
    {fields.map((field, index) => (
      <input
        key={field.id} // important to include key with field's id
        {...register(`test.${index}.value`)}
      />
    ))}
  );
}
동적인 폼을 만들때 사용하는 훅이다. 먼저, useForm() 훅을 불러온다.
다음으로, useFieldArray() 훅을 불러오고 name에 필드의 네이밍, control엔 useForm을 연결해준다.
useFieldArray가 반환하는 fields를 맵핑해서 폼의 각 필드를 만들면 되고, register엔 (useFieldArray 네이밍 + 인덱스 + value) 를 넘겨주면 된다.
또, useFieldArray의 메서드들로 필드를 추가, 전환, 삭제 등을 구현할 수 있다.
💙 React Hook Form + Yup 유효성 검증
React Hook Form에서도 Yup을 활용한 Schema 형태의 유효성 검증을 적용할 수 있다.
Yup은 각 키별로 메서드 체이닝을 통해 에러 메세지를 스키마 형태로 저장하는 유효성 검증 라이브러리이다.
각 키별로 유효성을 검증하는 체이닝 함수를 연계하며, 여기에는 검증하기 위한 값 혹은 에러 메세지 등을 인자로 넘긴다.
import styled from '@emotion/styled';
import { Controller, useForm } from 'react-hook-form';
import BaseButton from '../../components/common/button/BaseButton';
import BaseInput, { BaseInput_Styled } from '../../components/common/input/BaseInput';
import { yupResolver } from '@hookform/resolvers/yup';
import * as yup from 'yup';

const validationSchema = yup.object({
  id: yup.string().min(3, '아이디는 최소 3자 이상입니다.').required('아이디를 입력해주세요'),
  age: yup.number().min(2, '나이는 최소 두자리입니다').required('이름을 입력해주세요'),
  firstName: yup.string().required('성을 입력해주세요.'),
  lastName: yup.string().required('이름을 입력해주세요.'),
})

function ReactHookFormPage(): JSX.Element {
  const { formState, register, handleSubmit, control, getValues } = useForm<FormData>({
    mode: 'onChange',
    resolver: yupResolver(validationSchema),
    defaultValues: {
      id: "1",
      age: 10,
      firstName: '홍',
      lastName: '길동',
    }
  });

  const submitForm = (data: FormData) => {
    console.log('formData', data);
  }

  return (
    <Container>
      <form onSubmit={handleSubmit(submitForm)}>
        <BaseInput_Styled placeholder="아이디" {...register("id")} hasError={!!formState.errors.id} />
        <BaseInput_Styled placeholder="나이" {...register("age")} />
        <BaseInput_Styled placeholder="성" {...register("firstName")} />
        <BaseInput_Styled placeholder="이름" {...register("lastName")} />
        <BaseButton type="submit">제출</BaseButton>
      </form>
    </Container>
  )
}
내가 제작한 샘플코드가 길지만, 주요한 부분들만 짚어서 얘기해보겠다.
- 먼저, validationSchema를 Yup으로 만들어준다. 각 키(필드)에 대한 검사법과 에러 메세지를 설정한다.
- useForm에 resolver 옵션으로 스키마를 추가한다. 이 때, 스키마를 yupResolver 라이브러리로 감싸줘야한다.(별도 설치)
- 이 폼을 register로 적용한 각 필드에서는 name에 대응하여 스키마 검증이 적용된다.
* Yup
Yup 라이브러리의 상세 문법들은 아래 npm 문서를 참고하자. 여기선 컨셉만 이해하고, 주요 문법들은 별도 포스팅으로 소개하겠다!
yup
Dead simple Object schema validation. Latest version: 1.0.2, last published: 19 days ago. Start using yup in your project by running `npm i yup`. There are 4345 other projects in the npm registry using yup.
www.npmjs.com
Formik 못지 않게 많은 기능들을 제공하며, 특히 Yup 스키마 검증까지 가능한 점이 좋았다.
또한, Uncontrolled 기반이기에, 이전에 직접 구현하거나 Formik 등에서 Context를 사용했을 때 비해 성능적인 이점이 크다.
아래 React Hook Form 공식 Github를 참고하면, 많은 기능들을 제공하고 또 잦은 업데이트가 이뤄지는 많큼 Formik을 능가하는 범용성이 기대되는 라이브러리이다.
* Github 링크 : https://github.com/react-hook-form/react-hook-form/tree/master/examples
📎 출처
- [react-hook-form] 공식문서 : https://react-hook-form.com/get-started
- [Formik vs React Hook Form] refine blog : https://refine.dev/blog/react-hook-form-vs-formik/
- [React Hook Form] osci 님의 블로그 : https://tech.osci.kr/2023/01/02/introduce-react-hook-form/
- [React Hook Form] leitmotif 님의 블로그 : https://velog.io/@leitmotif/Hook-Form%EC%9C%BC%EB%A1%9C-%EC%83%81%ED%83%9C-%EA%B4%80%EB%A6%AC%ED%95%98%EA%B8%B0
반응형'Front-End(Web) > React - 라이브러리들' 카테고리의 다른 글
[Recoil] Recoil 고수의 길 - snapshot과 useRecoilCallback (0) 2023.10.05 [Recoil] Recoil 고수의 길 - atomFamily, selectorFamily (0) 2023.10.02 [Form 라이브러리] formik (0) 2023.03.15 [React Query] (6) Suspense와 Error Boundary 적용 (0) 2022.11.03 [React Query] (5) SSR (0) 2022.08.12